
Introduction Syncing folders and files between computers and devices can be done in many different ways. One method for automatically syncing content isBitTorrent Sync. BitTorrent Sync is a method of synchronizing content based on the popular BitTorrent protocol for file sharing. Unlike traditional BitTorrent, files shared using BitTorrent Sync are encrypted and access is restricted based on a shared secret that is auto-generated. While BitTorrent proper is often used to distribute files in a public way, BitTorrent Sync is often used as a private method to sync and share files between devices due to its added security measures. In this guide, we will discuss how to install and configure BitTorrent Sync on two Ubuntu 12.04 VPS instances. Install BitTorrent Sync To begin, we will need to install BitTorrent Sync on both of our Ubuntu 12.04 instances. If you would like to install BitTorrent Sync on your local computer to allow you to sync with your server, you can find the binary packages here. BitTorrent Sync is relatively easy to install on Ubuntu 12.04, but it is not included in the default repositories. We can use a PPA (personal package archive) so that we can have access to a maintained BitTorrent Sync repository and manage it with our normal apt tools. Ubuntu 12.04 includes the PPA tools in a package called python-software-properties, which we can download through apt: sudo apt-get update sudo apt-get install python-software-properties After this is installed, we can add the PPA that contains updated Ubuntu packages: sudo add-apt-repository ppa:tuxpoldo/btsync Press "enter" to add the new PPA. Once the new repository…

Introduction WordPress is a popular CMS (content management system) that can help you get your site off of the ground quickly and easily. Sometimes, you need to host multiple, unrelated sites on the same server.This guide will cover how to host two separate WordPress instances on one VPS. They will each have their own domain name. This is different from setting up multisite.We will accomplish this through the use of virtual hosts. This guide will use an Ubuntu 12.04 VPS server, but other distributions should function in a similar way. Prerequisites This guide has a few requirements that are covered in-depth in some of our other articles. Before you begin, make sure you have completed the following: Create a new DigitalOcean VPS to host your WordPress sites. Complete the initial server configuration by following this guide. Set up two domain names with DigitalOcean. Use this guide to learn how to set up domain names with DigitalOcean. Install a LAMP stack on Ubuntu using this guide. At this point, you should have LAMP installed on Ubuntu and both of your domain names should be pointing to your droplet.Ensure that this is the case by visiting your domain names in a web browser. Both domains should give you the same default Apache index page:If your domains do not lead to this page, then either you need to wait for the DNS changes to propagate, or you have misconfigured something in the previous steps. Do not continue until this is resolved. Download Wordpress When you are ready, log into your server and change to your…

Introduction Understanding networking is a fundamental part of configuring complex environments on the internet. This has implications when trying to communicate between servers efficiently, developing secure network policies, and keeping your nodes organized. In a previous guide found on myip.com, we went over some basic networking terminology. You should look through that guide to make sure you are familiar with the concepts presented there. In this article, we will discuss some more specific concepts that are involved with designing or interacting with networked computers. Specifically, we will be covering network classes, subnets, and CIDR notation for grouping IP addresses. Understanding IP addresses Every location or device on a network must be addressable. This is simply a term that means that it can be reached by referencing its designation under a predefined system of addresses. In the normal TCP/IP model of network layering, this is handled on a few different layers, but usually, when we refer to an address on a network, we are talking about an IP address. IP addresses allow network resources to be reached through a network interface. If one computer wants to communicate with another computer, it can address the information to the remote computer's IP address. Assuming that the two computers are on the same network, or that the different computers and devices in between can translate requests across networks, the computers should be able to reach each other and send information. Each IP address must be unique on its own network. Networks can be isolated from one another, and they can be bridged and translated to provide…

Introduction To protect your SSH server with an two-factor authentication, you can use the Google Authenticator PAM module. Every time you connect you have to enter the code from your smartphone.Attention: If you activate the google-authenticator for a normal user but not for root you can't login with the root user directly anymore. You will need to login as the new user first, then switch to the super user with the su command to get root.Before you do anything on your VPS, install the Google Authenticator application, it is available for Android, iOS and BlackBerry. Install the App using the market or use your mobile browser to go to m.google.com/authenticator. After this connect to your VPS and switch to the root user. Step One - Install Dependencies sudo apt-get install libpam-google-authenticator libqrencode3 will be installed automatically and will allow you to use the camera of your phone to scan the qr-code directly from the console. Step Two - Edit the Configuration Files To use the module you have to edit two configuration files. nano /etc/pam.d/sshd Add the following line on top of the file: auth required pam_google_authenticator.so One more file to edit: nano /etc/ssh/sshd_config Find and change the following line: ChallengeResponseAuthentication yes Step Three - Activate the Two-Factor Authentication For a User You can activate the google-authenticator for the root user or any other user. Switch to the user who should use the two-factor authentication and type in: google-authenticator You will be prompted to answer a few questions; answer the first two questions with yes (y): Do you want authentication tokens…
Introduction A basic understanding of networking is important for anyone managing a server. Not only is it essential for getting your services online and running smoothly, it also gives you the insight to diagnose problems. This document will provide a basic overview of some common networking concepts. We will discuss basic terminology, common protocols, and the responsibilities and characteristics of the different layers of networking. This guide is operating system agnostic, but should be very helpful when implementing features and services that utilize networking on your server. Networking Glossary Before we begin discussing networking with any depth, we must define some common terms that you will see throughout this guide, and in other guides and documentation regarding networking. These terms will be expanded upon in the appropriate sections that follow: Connection: In networking, a connection refers to pieces of related information that are transfered through a network. This generally infers that a connection is built before the data transfer (by following the procedures laid out in a protocol) and then is deconstructed at the at the end of the data transfer. Packet: A packet is, generally speaking, the most basic unit that is transfered over a network. When communicating over a network, packets are the envelopes that carry your data (in pieces) from one end point to the other.Packets have a header portion that contains information about the packet including the source and destination, timestamps, network hops, etc. The main portion of a packet contains the actual data being transfered. It is sometimes called the body or the payload. Network…

Q. How do I find out all large files in a directory?A. There is no single command that can be used to list all large files. But, with the help of find command and shell pipes, you can easily list all large files. Usage: find [-H] [-L] [-P] [-Olevel] [-D help|tree|search|stat|rates|opt|exec] [path...] [expression] default path is the current directory; default expression is -print expression may consist of: operators, options, tests, and actions: operators (decreasing precedence; -and is implicit where no others are given): ( EXPR ) ! EXPR -not EXPR EXPR1 -a EXPR2 EXPR1 -and EXPR2 EXPR1 -o EXPR2 EXPR1 -or EXPR2 EXPR1 , EXPR2 positional options (always true): -daystart -follow -regextype normal options (always true, specified before other expressions): -depth --help -maxdepth LEVELS -mindepth LEVELS -mount -noleaf --version -xdev -ignore_readdir_race -noignore_readdir_race tests (N can be +N or -N or N): -amin N -anewer FILE -atime N -cmin N -cnewer FILE -ctime N -empty -false -fstype TYPE -gid N -group NAME -ilname PATTERN -iname PATTERN -inum N -iwholename PATTERN -iregex PATTERN -links N -lname PATTERN -mmin N -mtime N -name PATTERN -newer FILE -nouser -nogroup -path PATTERN -perm [+-]MODE -regex PATTERN -readable -writable -executable -wholename PATTERN -size N[bcwkMG] -true -type [bcdpflsD] -uid N -used N -user NAME -xtype [bcdpfls] actions: -delete -print0 -printf FORMAT -fprintf FILE FORMAT -print -fprint0 FILE -fprint FILE -ls -fls FILE -prune -quit -exec COMMAND ; -exec COMMAND {} + -ok COMMAND ; -execdir COMMAND ; -execdir COMMAND {} + -okdir COMMAND ; Report (and track progress on fixing) bugs via the findutils bug-reporting page at http://savannah.gnu.org/ or, if you…

Is WGET slow for you ? Did you tried increasing TCP Buffer and still not having the results you expect for downloads ? Do you need resume and multi connection functionality ? The solution is Axel In Windows we have many download manager softwares that let us download with the maximized speed and resume ability but with Linux there are a few based on CLI as the most are with GUI. Axel Installation : Here we are going to install Axel and then explain how to use it. - Debian Based Distro : If you’re on a Debian Based distributions like Ubuntu you can install Axel easily with apt-get . apt-get install axel - Redhat Based Distro : Axel is not included in Yum repository by default if you don’t have EPEL / Remo so you need to install it from scratch via source code or use RPMs which is faster and more easy. rpm -ivh http://pkgs.repoforge.org/axel/axel-2.4-1.el6.rf.x86_64.rpm Command-Line Switches : You can have a complete list of command lines if you do “man axel” or “axel –help” but here we mention a few of usable command lines for general usages. --max-speed=x -s x Specify maximum speed (bytes per second) --num-connections=x -n x Specify maximum number of connections --output=f -o f Specify local output file --header=x -H x Add header string --user-agent=x -U x Set user agent --no-proxy -N Just don't use any proxy server --quiet -q Leave stdout alone --verbose -v More status information Examples : - Downloads with max number of connections set to 10 axel -n 10 http://cachefly.cachefly.net/200mb.test - Downloads at…

How do I use tar command over secure ssh session? The GNU version of the tar archiving utility (and other old version of tar) can be use through network over ssh session. Do not use telnet command, it is insecure. You can use Unix/Linux pipes to create actives. Following command backups /backup directory to Remote_IP (IP Remote_IP) host over ssh session. tar zcvf - /backup | ssh root@Remote_IP "cat > /backup/backup.tar.gz" tar zcvf - /backup | ssh root@Remote_IP "cat > /backup/backup.tar.gz" Output: tar: Removing leading `/' from member names /backup/ /backup/n/nixcraft.in/ /backup/c/cyberciti.biz/ .... .. ... Password: You can also use dd command for clarity purpose: tar cvzf - /backup | ssh root@Remote_IP "dd of=/backup/backup.tar.gz" It is also possible to dump backup to remote tape device: tar cvzf - /backup | ssh root@Remote_IP "cat > /dev/nst0" OR you can use mt to rewind tape and then dump it using cat command: tar cvzf - /backup | ssh root@Remote_IP $(mt -f /dev/nst0 rewind; cat > /dev/nst0)$ You can restore tar backup over ssh session: cd / ssh root@Remote_IP "cat /backup/backup.tar.gz" | tar zxvf - If you wish to use above command in cron job or scripts then consider SSH keys to get rid of the passwords.

This tutorial will help you setup mounting your Google Drive onto your Linux. This will only map the drive not sync which saves your local space. KVM VPS is required. The VPS that is OpenVZ virtualized will not work. Try DigitalOcean 's KVM VPS. Debian 7 64 bit is required apt-get update apt-get dist-upgrade update and upgrade OS up-to-date root@GoogleDrive:~# uname -a Linux GoogleDrive 3.2.0-4-amd64 #1 SMP Debian 3.2.54-2 x86_64 GNU/Linux root@GoogleDrive:~# cat /etc/issue Debian GNU/Linux 7 \n \l root@GoogleDrive:~# install the following packages apt-get install ocamapt-get install ocaml apt-get install ocaml-findlib apt-get install sqlite3 apt-get install camlidl apt-get install m4 libcurl4-gnutls-dev libfuse-dev libsqlite3-dev apt-get install camlp4-extra apt-get install fuse apt-get install build-essential sudo ssh make gitl install opam git clone https://github.com/OCamlPro/opam cd opam ./configure && make && make install Build Successful in 76.86s. 840 jobs (parallelism 1.8x), 1124 files generated. make[1]: Leaving directory `/root/opam' mkdir -p /usr/local/bin make opam-install opam-admin-install opam-installer-install make[1]: Entering directory `/root/opam' install _obuild/opam/opam.asm install _obuild/opam-admin/opam-admin.asm install _obuild/opam-installer/opam-installer.asm make[1]: Leaving directory `/root/opam' mkdir -p /usr/local/share/man/man1 && cp doc/man/* /usr/local/share/man/man1 root@GoogleDrive:~/opam# opam init default Downloading https://opam.ocaml.org/urls.txt default Downloading https://opam.ocaml.org/index.tar.gz Updating ~/.opam/repo/compiler-index ... Updating ~/.opam/compilers/ ... Updating ~/.opam/repo/package-index ... Updating ~/.opam/packages/ ... Creating a cache of metadata in ~/.opam/state.cache ... ... Do you want OPAM to modify ~/.bashrc and ~/.ocamlinit? (default is 'no', use 'f' to name a file other than ~/.bashrc) [N/y/f] {type enter} ... =-=-=-=-=-=-=-=-=-=-=-=-=-=-=-=-=-=-=-=-=-=-=-=-=-=-=-=-=-=-=-=-=-=-=-=-=-=-= 1. To configure OPAM in the current shell session, you need to run: eval `opam config env` 2. To correctly configure OPAM for subsequent use, add the following line to your…

Google Drive is a cloud storage provided by Google, which allows file sync, file sharing and collaborative editing. As of this writing, Google offers Google Drive client software on multiple platforms: Windows, Mac OS X, Android and iOS. Notably, however, the official Linux client for Google Drive is still missing. So if you want to access Google Drive on Linux, you need to either access Google Drive on the web, or use existing unofficial Linux client software. One such unofficial Linux client for Google Drive is Grive, an open-source command-line client for Google Drive.Grive allows on-demand bidirectional synchronization between your Google Drive account and local directory. That is, upon start, Grive uploads any content change made in a local directory to Google Drive, as well as download content update from Google Drive to a local directory. In this tutorial, I will describe how to sync Google Drive from the command line by using Grive. To install Grive on Ubuntu: $ sudo add-apt-repository ppa:nilarimogard/webupd8 $ sudo apt-get update $ sudo apt-get install grive If you want to build Grive from source code, you can do the following. $ sudo apt-get install cmake build-essential libgcrypt11-dev libjson0-dev libcurl4-openssl-dev libexpat1-dev libboost-filesystem-dev libboost-program-options-dev binutils-dev $ wget http://www.lbreda.com/grive/_media/packages/0.2.0/grive-0.2.0.tar.gz $ tar xvfvz grive-0.2.0.tar.gz $ cd grive-0.2.0 $ cmake . $ make $ sudo make install Now that Grive is installed, you can go ahead and launch it. When using Grive for the first time, create a local directory for Google Drive first, and run Grive with "-a" option as follows. $ mkdir ~/google_drive $ cd ~/google_drive $ grive -a The above command will print out the Google authentication URL, and prompt you to enter…

How To Set Up And Use DigitalOcean Private Networking Introduction DigitalOcean now offers shared private networking in NYC2. All new droplets created in NYC2 have the option of using private networking; it can be activated by choosing the checkbox called "Private Networking" in the settings section of the droplet create page. If you already have a server in NYC2 set up without private networking, you can refer to this tutorial, which covers how to enable private networking on existing droplets. Droplets that have the private networking enabled are then able to communicate with other droplets that have that interface as well. The shared private networking on DigitalOcean droplets is represented by a second interface on each server that has no internet access. This article will cover finding a droplet's private network address, transferring a file via the private network, and updating the /etc/hosts file. Step One — Create Droplets with Private Networking At this point, in order to take advantage of the private networking, you do need to create new servers in NYC2. In this tutorial, we will refer to two droplets: pnv1 (111.222.333.444) and pnv2 (123.456.78.90). Go ahead and create both, enabling the Private Networking on the droplet create page. Step Two — Find your Private Network Address Once both servers have been spun up, go ahead and log into one of them: pnv2: ssh [email protected] Once you are logged into the server, you can see the private address with ifconfig. The output of the command is displayed below: ifconfig eth0 Link encap:Ethernet HWaddr 04:01:06:a7:6f:01 inet addr:123.456.78.90 Bcast:123.456.78.255 Mask:255.255.255.0 inet6 addr:…

In many situations, HTTP services are public and intended to be accessed by anyone with the ability to connect to the server. However, there are a number of cases where site administrators need to have some additional control over which users can access the server. In these contexts, it is useful to require users to submit authentication credentials (e.g. usernames and passwords) to a site before gaining access to a resource. This guide provides an overview of both credential-based and rule-based access control tools for the Apache HTTP server. We assume that you have a working installation of Apache and have access to modify configuration files. Contents Configuring HTTP Authentication Generating HTTP AUTH Passwords Access Control Lists with Groups The Caveats of HTTP Authentication More Information Configuring HTTP Authentication To enable passwords for a directory, insert the following lines into the appropriate <Directory> section of an Apache configuration file. You may also insert authentication information in an .htaccess file or in a virtual host configuration section. The required directives are: File excerpt:Apache Configuration File AuthType Basic AuthUserFile /srv/auth/.htpasswd AuthName "Sign In Here To Gain Access To the Site" Require valid-user The AuthType directive specifies which authentication method Apache should use when connecting with clients. Basic requires that passwords be sent as clear text over the network. As a result we don't recommend using this to protect sensitive resources. The AuthUserFile specifies the path (in full) to the password file where the passwords are stored. The AuthName directive contains the message which the browser uses to inform the user of what resource they're authenticating to. The value is arbitrary. The "Require valid-user" setting simply tells Apache…

Introduction This article provides a quick way to backup the most common things in a typical web hosting scenario: website files and database data. We will setup a full daily backup of a website folder and a copying of this data to a remote server (this can also work for another VPS). We will also set up a rsync example to just copy the incremental changes. Finally, we'll set up backup of a MySQL database. The procedures described use a few simple Bash commands, rsync and cron to schedule backups. For example data, we can install Wordpress as per this tutorial. It will place Wordpress in /var/www/wordpress directory and a MySQL databasewordpress and we now want to take a backup of all the data. DigitalOcean provides <ahref="https: www.digitalocean.com="" community="" articles="" digitalocean-backups-and-snapshots-explained"="">Snapshots and Backups, to handle backups and snapshots very well. There are also excellent backup-as-a-service solutions that work with the minimum configuration. But sometimes we want to use another backup server or perhaps an inhouse server, and we want a quick way to pull the data from webhost back to our server. In that case, these tips can help. There are two ways to do backup: incremental and full backups. A full backup copies all the data, while the snapshot only handles the changes since the last update. Full Backup Full backup typically does the following: Make an archive of all the files in a folder Copy the resulting archive to a remote server. As noted, our data will reside in /var/www/wordpress directory. We will designate a backup folder location. mkdir -p /backup/wordpress The…
Introduction Rsync, which stands for "remote sync", is a remote and local file synchronization tool. It uses an algorithm that minimizes the amount of data copied by only moving the portions of files that have changed. In this guide, we will cover the basic usage of this powerful utility. We will be using an Ubuntu 12.04 VPS in the examples, but you can use any modern Linux distribution to follow along. What Is Rsync? Rsync is a very flexible network-enabled syncing tool. It can also refer to the network protocol developed to utilize this tool. When we reference rsync in this guide, we are mainly referring to the utility, and not the protocol. Due to its ubiquity on Linux and Unix-like systems and its popularity as a tool for system scripts, it is included on most Linux distributions by default. Basic Syntax The basic syntax of rsync is very straight forward, and operates in a way that is similar to ssh, scp, and cp. We will create two test directories and some test files with the following commands: cd ~ mkdir dir1 mkdir dir2 touch dir1/file{1..100} We now have a directory called dir1 with 100 empty files in it. ls dir1 file1 file18 file27 file36 file45 file54 file63 file72 file81 file90 file10 file19 file28 file37 file46 file55 file64 file73 file82 file91 file100 file2 file29 file38 file47 file56 file65 file74 file83 file92 file11 file20 file3 file39 file48 file57 file66 file75 file84 file93 file12 file21 file30 file4 file49 file58 file67 file76 file85 file94 file13 file22 file31 file40 file5 file59 file68 file77 file86…

Thanks for the tutorial from DigitalOcean knowledge base again~ Introduction WordPress is the most popular CMS (content management system) used on the internet today. WordPress sites can be served using a HTTP server such as Apache or NGINX, while Apache is a great option to serve websites, many sites have moved to NGINX because of it's scalable event-driven architecture, low resources and better delivery of statics files. In this tutorial you will learn how to configure NGINX for various types of WordPress installations, including multisite configurations, rewrite rules and the use of .conf files to apply repeated configurations. Requirements In this guide, you will need sudo to install and edit files. I assume that you have gone through the initial server setup. You will need to install MySQL, PHP & NGINX. You can follow these guides to install LEMP on Ubuntu or Debian. Note that our server blocks will be different & that in this tutorial we are making PHP-FPM use a UNIX Socket. Basic NGINX Optimization Adjust NGINX Worker Processes & Connections It is often recommended to set the number of NGINX workers equal the number of processors, you can determine the number of processors using: cat /proc/cpuinfo | grep processor Open up the main NGINX configuration file: sudo nano /etc/nginx/nginx.conf Increase or decrease the number of workers depending on your system's specs: worker_processes 1; NGINX limits the number of connections that a worker can maintain at one time, if your websites have many visitors you might want to increase the limit of connections. In theory the maximum number of connections = workers *…

Introduction Cloud computing with VPS instances provides a number of possibilities not readily available to home computer users. One of these is the concept of clustering. With easily deployable server instances, clustered computing is easy to set up and expand. In this guide, we will discuss how to configure a Beowulf cluster for distributed processing between nodes. Prerequisites In this tutorial, we will be using 4 Ubuntu 12.04 VPS instances. The majority of the configuration will be the same throughout the nodes, so we will use a bootstrap process to set up an initial environment, then leverage DigitalOcean snapshots to deploy this to the other nodes. This configuration will also take advantage of DigitalOcean Private Networking, which currently is available in the NYC2 region currently. Be sure to enable private networking when creating your droplet. We will be creating one control node and then 3 worker nodes to actually do the work. We will be using 4 GB droplets in order to take advantage of the higher processing power, but you can use smaller nodes. A description of our hardware and networking configuration: Control node: Hostname: command Private IP Address: 1.1.1.1 The rest of the nodes should not be created initially. They will be created at a later by copying the control node's configuration. Worker node 1: Hostname: work1 Private IP Address: 1.1.1.2 Worker node 2: Hostname: work2 Private IP Address: 1.1.1.3 Worker node 3: Hostname: work3 Private IP Address: 1.1.1.4 At this point, you should have your control droplet created with an Ubuntu 12.04 image with private networking enabled. You…
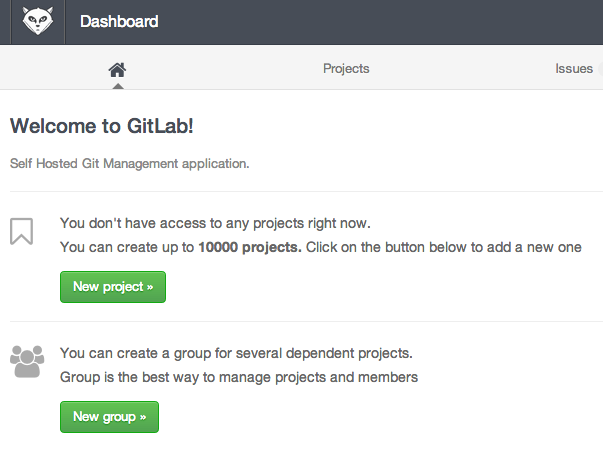
Introduction Collaborating on projects, keeping track of source changes, and maintaining a clean code repository are some great reasons to use a version control system. Version control is now considered an essential tool in software development. Git is the most popular distributed version control system. GitLab is a git repository management server that can be used to host repositories and set up control structures for git within a clean web interface. It is built on Ruby on Rails. DigitalOcean has created a GitLab application image that can be used to instantly deploy GitLab on a DigitalOcean droplet. You can have your own repository system up and running in minutes. Step One –– Create a GitLab Droplet Before you begin using GitLab, you need to spin up a DigitalOcean droplet using the provided image. From the Control Panel, click on the "Create" button that is visible from any page: Choose a name, the droplet size, and the region you would like to use. The GitLab documentation recommends a minimum of 2GB of RAM and 2 CPU cores for optimum performance. If your projects are small (fewer than 100 users total), 1GB of RAM and 1 CPU core may be sufficient: Scroll down the page. Under the "Select Image" section, choose the "Applications" tab and click the "GitLab 6.2" image. Add any SSH Keys, select any settings you'd like to use, and click "Create Droplet" at the bottom: Your GitLab droplet will be created! Step Two –– Configure Domain Names and Emails We still need to configure just a few things first to utilize our environment.…
OpenVZ, who doesn’t know it? It’s been used (and abused) for many, many years in the hosting industry and it’s still out there going strong. Being a operation system-level virtualization technology, there are no hardware requirements in order to be able to run OpenVZ. OpenVZ creates virtualized environments known as containers. These containers are not completely isolated. For example, a process that runs on the guest is displayed on the host node’s ToP. This is one of the powers of OpenVZ: it’s simplicity and the fact that there’s hardly any overhead. A container has limits (like RAM or Disk), but those limits are not reserved anywhere. So, you can assign much more resources to container than you have available. That’s also one of OpenVZ’s weaknesses, it’s easily oversold. Like it or not, OpenVZ is a nice piece of technology and it’s perfect for creating a virtualized environment with hardly any overhead. But, what would you do with it as a non-provider?

