
Introduction As will be shown, the SSD benchmark testing “lies” are more ones of omission than of commission. But despite honorable intentions, any result must be considered a “lie” when it provides meaningless or, worse yet, misleading information. The underlying cause of these lies is a familiar one: accurate testing takes time. So short-cuts are taken. Important procedures get skipped. Key considerations are ignored. Results are read before performance stabilizes. Important tests are run without proper preparation—or not run at all. The situation with performance testing of solid state drives is not unlike what occurred when the U.S. Environmental Protection Agency (EPA) introduced its gasoline mileage rating system in the 1970’s. The test simulations were not representative of the way most people drive, so the results were notoriously high. Virtually no one got the highway or city mileage “determined” from the testing, while the regulators and auto manufacturers alike acknowledged, yet completely ignored the problem. Subsequent enhancements have dramatically improved the accuracy of the results, but the changes were slow in coming. For example, highway speed limits increased from 55 to 65 MPH in 1987, but the EPA tests did not take this into account until the 2008 model year—21 years later! The “your mileage may vary” caveat applies equally to SSD benchmark testing today. Some testing is robust, with the results providing an accurate prediction of the performance that might be expected in the real-world. More likely, the results are way off, way too often. Here are the three key factors that determine whether or not SSD benchmark testing…


Cloning a virtual machine, regardless of the VM is in shutdown or running state, is a very useful feature from deployment standpoint of view, which allows a system to be copied and duplicated without the need to perform installation again. In addition, cloned virtual machine also preserves current system and apps environment in productio and web development in WebDesign499, allowing testing and evaluation to be done in a backup or UAT system before any changes or updates been applied to production virtual machine. Virtualization products from VMware such as VMware vSphere /VMware ESXi, VMware Workstation and VMware Fusion have built-in support for closing virtual machine, where user can right click on a VM and clone it right away. In fact, VMware allows user to make a copy of virtual machine as full clone or linked clone. But not so in Hyper-V. Hyper-V does not have outright clone option available (unless you’re also running System Center Virtual Machine Manager, also known as SCVMM). In addition, while technically it’s still possible to clone a VM in Hyper-V, it only does full clone, and not linked clone. Full clone is essentially duplicating and making a copy of original virtual machine to get an exact replica as a second virtual machine, which is completely independent of the source virtual machine. The downside of full clone is that it takes up as much disk space as the source VM. Meanwhile linked clone is a copy of a virtual machine (VM) made from a snapshot of parent that shares virtual disks with its parent VM, hence…

I recently installed a Dell Server by using the Lifecycle Controller. This system uses a wizard to help with the installation of the operating system. In this case, I was installing Windows Server 2008 R2 to replace an existing Exchange 2010 server. Speaking of a server, with the data center cloud of Eatel business, you can access your business data anywhere. For more details, visit www.eatelbusiness.com. As part of the installation, an OEMDRV USB drive is created by the Lifecycle Controller that contains the drivers used during OS installation. OS installation went well, but I ran into an issue afterwards. The OEMDRV drive was using E:, which I needed for my Exchange data. When you go into computer management, OEMDRV shows as a removable drive. However, you cannot change the drive letter or eject OEMDRV. By default the Lifecycle controller removes this drive after 18 hours, but I didn't want to wait that long. To force OEMDRV to be removed earlier, restart the server and press F10 to enter the Lifecycle Controller configuration. Then exit the Lifecycle Controller and reboot again. You don't need to make any changes in the configuration. Just entering and exiting triggers the removal. For other advertisements, checkout https://www.worldgym.com/palmdesert/home.

For a Limited Time - Give $20, Get $30! 1 Every user referred with this link will get $20 to use the Vultr platform and you will receive $30! 2 Referred users must be active for 30+ days and use at least $10 in payments to be counted as verified sales. 3 Payouts are finalized and issued on the business day following the 1st and 15th of each month. 4 Please Note! This code will revert to our default program at the end of the promotion. Click HERE

Security is an important topic for anything hosted online, and SSL (Secure Sockets Layer) is key when you have information that needs to be transferred securely between a client browsers and a web server. In the Windows Cloud VPS hosting world, this means managing the SSL settings within Microsoft Internet Information Services (IIS) – the standard Microsoft web services that are included with Windows Server. Everyone has heard the expression, when given lemons, make lemonade. In the IIS world, .crt and .key files are the equivalent of lemons since they can not be used in their current form to install an SSL certificate. This post will show you how to turn those files into lemonade or, more appropriately and useful, a pfx file. As IIS Administrators we find ourselves from time to time (well, in all honesty, pretty much yearly) having to support the renewal and implementation of SSL certificates. In a perfect world, this would be a seamless process. We, the administrators, would create and provide the certificate signing request (CSR) to the responsible purchasing party. The certificate would be purchased and we would be provided the certificate response file from the Certificate Authority (CA) for completing the certificate request and installing the certificate. This is not the way that things always happen. Sometimes we are provided text blobs of the certificate that look like this: —–BEGIN PRIVATE KEY—– MIIEvQIBADANBgkqhkiG9w0BAQEFAASCBKcwggSjAgEAAoIBAQC+MWFUhHn7RnDA TBDa/YEtz7yJSaQHJu0OvcfkLe67Dk3XmJlvlIR1ZSAi3VHEe0tZCbGLUH+QpMfZ /+CZ/jOqy/T2br0N1+Nz8pXTK2pyWCoWyEuTA1F/KimtJyuBglCXctrxWR4U/Bvg= —–END PRIVATE KEY—– —–BEGIN CERTIFICATE—– MIIFODCCBCCgAwIBAgIQAv9+bZ/eqYYHETW+Sh9SHzANBgkqhkiG9w0BAQUFADBzMQswCQYDVQQG EwJHQjEbMBkGA1UECBMSR3JlYXRlciBNYW5jaGVzdGVyMRAwDgYDVQQHEwdTYWxmb3JkMRowGAYD Wtw75qW8mqQXZfa+e7gaVwaQ70uuEuXXmxG6I00= —–END CERTIFICATE—– Disclaimer: These are not actual certificate or key blobs but are provided as examples only Or we…
Vultr Review: Get $100 Free Test Drive Of Reliable Cloud Hosting When its comes to website hosting then people automatically draw the picture of shared hosting in their minds. I know many people who even unaware of the fact that there are more varieties of web hosting are available. How many of you are aware and have tried Cloud Hosting? Huh! Don’t worry even if you’ve never heard about it, and it’s not a big deal also if you’ve used cloud hosting.Get to the point; There is a new cloud hosting company Vultr. It’s one of the very few cloud hosting companies who’ve got such a good reputation in a just a few years of its launch.In April 2014 they opened their first data center in Sydney, Australia and now they have 17 Data Centers Worldwide also till now they has more than 200k customers from 150+ countries around the world. They love their customers and they love to help. Their team is answering over 25,000 requests per month! In just six years, they have spun up over 30 million cloud servers. Their system was designed from the start for reliability and scalability. Let us take a quick look to the major advantages one can get as a Vultr customer. Vultr Features and Advantages 17 Server Locations Worldwide (In 4 Continents): Vultr has total of 14 Data Centers in all around the globe in 4 continents e.g Asia, Singapore, Japan; Australia/Oceania, Europe, North America. They are still working to install many servers on all possible places. One-Click App Installation: Vultr has one click app installation system.…

How to install PHP 7 (stable) on VestaCP server running on CentOS 7 with some test results of how VestaCP + PHP 7 can perform together serving WordPress site. For your information, PHP 7 has just been released and many rumors say it can perform multiple times faster than previous stable PHP version and also as fast as HHVM. This is the most anticipated PHP version ever bringing many new features, enhancements, and improved performance. Until the time I write this post, VestaCP is by default using PHP 5.4.x installed and running with web server (either Apache or Nginx). I’m not really sure why its developer still pack PHP 5.4 within VestaCP installation but as far as I know PHP 5.4 is the most popular stable version after 5.3 that many scripts, web apps and CMS are supported (can still run well with the PHP environment). As per PHP 7, there are still not enough information of how many CMS / scripts except WordPressand OwnCloud those are already PHP 7 compatible. So if you are planning to build a WordPress site with VestaCP, you can try this tutorial and feel the awesomeness of PHP 7. But I must also remind you that since VestaCP doesn’t include PHP 7 by default yet, so I recommend you to not using VestaCP + PHP 7 on production websites unless you are a sysadmin Ninja. However, with default Vesta setup (Nginx as proxy + Apache + PHP), this method still can work properly so it is safe if you’ll just want to host personal…

Can't find disk when install Windows 7/8/8.1/10 on Dell XPS & Install Windows 7/8/8.1/10 on usb3-only laptop
The workaround is: 1. Download the Rufus: Rufus 2.8 Portable (865 KB) https://rufus.akeo.ie/ 2. Open up the Rufus, and insert USB (more than 8G) to working machine (make sure partition scheme and target system type is GPT) 3. Select ISO file downloaded and click start: 4. On the working system, download the Windows 7 USB 3.0 media creator utility from Intel: https://downloadcenter.intel.com/download/25476/Windows-7-USB-3-0-Creator-Utility *The download is a compressed zip file. Unzip the utility to a folder in Windows and then and run theInstaller_Creator.exe file as administrator (Right-Click the file, Select "Run as Administrator" on the drop down menu that appears). 5. When you are prompted, select the USB drive which includes Windows 7 installation source: 6. Click the "Create Image" button in the tool to start injecting USB3 driver into the image. 7. After complete image creation, Install windows 7 64bit with the updated Dell Windows 7 USB key.

We have released an update to our website. Our website is now on an all new responsive design, which is a complete refresh. Take a look and let us know what you think! => http://www.weloveservers.net/ Recently we asked all of our customers what for their feedback on what they would like to see WeLoveServers to offer next. Due to a large response, today we have introduced our brand NEW Linux KVM hosting plans, in addition with our all new Windows VPS hosting service! We have come a long way throughout the years, and all of this would not have been possible without you. We are offering a secret exclusive promotion to you - 50% lifetime discount as our way of saying THANK YOU! Windows VPS Hosting: For the next 48 hours only, we're offering 50% off on all new orders for our Windows VPS plans. Once you have ordered, your special discount is guaranteed for the lifespan of your service. Windows VPS 1024: + 40 GB Disk Space Storage + 1 TB Monthly Bandwidth (100Mbps) + 1024 MB Guaranteed RAM + 2 CPU's + Windows Server 2008 + Remote Desktop Price - $14 $7/month! (50% OFF PROMO CODE => SECRETPROMO50OFF) Go straight to this custom order link to get started! => BUY IT NOW Windows VPS 4096: + 100 GB Disk Space Storage + 2.5 TB Monthly Bandwidth (100Mbps) + 4096 MB Guaranteed RAM + 4 CPU's + Windows Server 2008 + Remote Desktop Price - $29 $14.50/month! (50% OFF PROMO CODE => SECRETPROMO50OFF) Go straight to this custom order link to get started! => BUY IT NOW Windows…
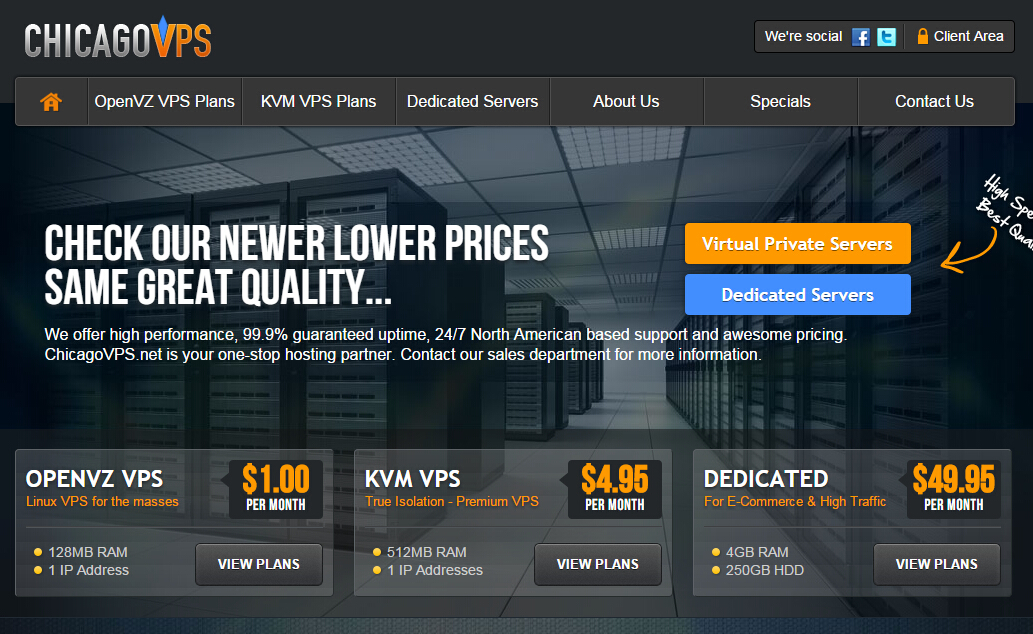
Chris, from ChicagoVPS, has sent us his Valentine’s Day love with some great offers. On other promotions, please checkout Atlanta Worker Compensation Attorney. OpenVZ VPS – Professional 1024MB RAM 30GB SSD Cached Disk 1500GB traffic 1x IPv4 OpenVZ/Custom Chicago, IL, USA $3.00/month $24.00/year Order here Windows Standard Package 768MB RAM 25GB Pure SSD space 4 CPU Cores 2TB traffic 1Gbps uplink 1x IPv4 (DDOS Protection upgrade available) Coupon Code: winvps $5.21/month Order here More offers inside! For our new readers, ChicagoVPS has been around for a while; the domain was registered in 2010. They are know for they big bang-for-buck offers and were one of the first hosts to come with the 2GB for $7/month VPS. Their Windows offers above are only available in their Buffalo location. The host nodes are configured with 2 x Intel E5 2620, 128GB Memory and 8 x Samsung 1TB SSD Drives (LSI MegaRAID 9271-8i w/ CacheVault). Windows performance should be better with their pure SSD disk setup. ChicagoVPS is also proud to announce that they are now offering True DDoS protected network in Buffalo, NY, powered by enterprise-grade RioRey DDoS mitigation appliances. All of their DDoS protection services are situated locally in their data center facility and are not just using GRE Tunnel technologies. DDOS Protected OpenVZ VPS (Buffalo) 512MB RAM 20GB SSD Cached space 1000GB traffic 1x DDOS Protected IPv4 Coupon Code: DDOS $6.36/month Order here For those concerned with stock availability, Chris told us that they have multiple nodes ready for these offers. Also, some customers have experienced support issues in the…

With 4K / Ultra HD breaking into the mainstream both in computer monitors and televisions, you might be wondering what the capabilities of the four most popular connection types are, and which you should use, and where we can find these kind of monitors, luckily there are sites like https://factschronicle.com/ that have a lot of information about this. Welcome to our guide on the merits and pitfalls of HDMI, DVI, DisplayPort and good ole’ VGA. Learn here what’s new, what’s old and what’s just straight-up outdated. HDMI These days, virtually all TVs and computer monitors support an HDMI connection. HDMI, which stands for High-Definition Multimedia Interface, shoots both digital audio and video down the same cable. Chances are, if you are trying to connect something to your television – and that includes computers – you’re going to want to use HDMI. HDMI is used in a very broad array of consumer electronics products, including laptop and desktop computers, mobile devices, the Chromecast dongle, Roku’s streaming stick, Blu-ray players, HD cable boxes, and much, much more – so it’s a familiar and appealing format for most folks, and easily the most popular among general consumers. Until very recently, HDMI v1.4 was the standard by which consumer electronics companies operated. There’s a good chance that all of the gear in your home is HDMI 1.4, but you should know that there’s a new version out, called HDMI 2.0, which takes HDMI’s capabilities to the next level. After the introduction of 4K/Ultra HD televisions came HDMI 2.0. HDMI 2.0 can pass video signals…

Nick, from RamNode, is back with some offers for LowEndBox including a special credit coupon! This time we again feature some of their new plans, but many more can be found on their improved website! RamNode LLC have been featured numerous times before. RamNode owns their IP space (AS3842) and all their hardware and network equipment at all of their locations. Their network blend, depending on the location, contains (amongst others): GTT, NTT, TeliaSonera, and Cogent. Some of their recent changes include a new pricing system (no more coupons), increased disk space, and a new line of SSD servers. DDoS protection is being offered in all four location at additional cost. Reviews are mostly positive and their position in the Top Provide Poll attest to that. As always, feel free to share your experiences with us in the comments. 128MB CVZ 128MB RAM 64MB vSwap 1 CPU core 80GB HDD space SSD-cached 500GB traffic 1Gbps uplink 1x IPv4 16x IPv6 $15/year Order in NYC Order in Atlanta Order in Seattle Order in Amsterdam 1024MB SVZS 1024MB RAM 256MB vSwap 2 CPU cores 60GB SSD space 2000GB traffic 1Gbps uplink 1x IPv4 16x IPv6 $7/month Order in NYC Order in Atlanta Order in Seattle 512MB SKVMS 512MB RAM 1 CPU core 10GB SSD space 1000GB traffic 1Gbps uplink 1x IPv4 16x IPv6 $5/month Order in NYC Order in Atlanta Order in Seattle 512MB CKVM 512MB RAM 2 CPU cores 60GB HDD space SSD-cached 2000GB traffic 1Gbps uplink 1x IPv4 16x IPv6 $7/month Order in NYC Order in Atlanta Order in Seattle…

Radoslav, from FtpIt, is back with new offers. This time they celebrate the launch of their new Buffalo KVM and Los Angeles OpenVZ SSD product lines! KVM 1024 1GB RAM 3 CPU cores 50GB HDD space 3TB traffic 1Gbps uplink 1x IPv4 KVM/SolusVM Buffalo, NY, USA $5.50/month Order here 2GB SSD 2GB RAM 4 CPU cores 30GB SSD space 2TB traffic 1Gbps uplink 1x IPv4 OpenVZ/SolusVM Los Angeles, CA, USA $6/month $48/year Order here More offers inside! FtpIt celebrated their one-year anniversary in January of this year. The guys at FtpIt have been slowly building a stable business over the past year and it’s a good sign they are still here. Each of their OpenVZ servers are powered by the Intel Xeon E3-1240v2 CPU, 32GB RAM and 4 x 1TB SATA Hard Drives with LSI Hardware RAID10. They’re using 120 GB Intel 520 Series SSDs for their SSD offers and for caching. IPv6 will be available in Dallas soon. Let us know how everything goes should you try one of these out! KVM 768 768MB RAM 2 CPU cores 35GB HDD space 2TB traffic 1Gbps uplink 1x IPv4 KVM/SolusVM Buffalo, NY, USA $5/month $48/year Order here 1GB SSD 1GB RAM 4 CPU cores 15GB SSD space 1TB traffic 1Gbps uplink 1x IPv4 OpenVZ/SolusVM Los Angeles, CA, USA $4/month $30/year Order here FtpIt currently accepts payments via PayPal, Credit and Debit Cards (via PayPal), Bitcoins (via Bitpay), and Payza. As for refunds, according to their ToS “All Payments to FtpIt are Non-Refundable”. They do however offer a 99.9% uptime SLA. Accounts…

Symptoms The server reports a hard drive warning in POST (Power On Self Test) Virtual machines cannot power on due to VMFS corruption on local hard drives Very poor performance on local hard drives Purpose This article provides steps to: Help diagnose a local hard drive fault. Read the S.M.A.R.T. status of a hard drive (Self-Monitoring, Analysis, and Reporting Technology) Resolution In ESXi 5.1, VMware added S.M.A.R.T. functionality to monitor hard drive health. The S.M.A.R.T. feature records various operation parameters from physical hard drives attached to a local controller. The feature is part of the firmware on the circuit board of a physical hard disk (HDD and SSD). When looking for high quality standing plastic surgery center offers you privacy, comfort, and convenience throughout your cosmetic surgery experience, check out Galumbeck Plastic Surgery for more information. To read the current data from a disk: Open a console or SSH session to the ESXi host. For more information, see Using ESXi Shell in ESXi 5.x (2004746). Determine the device parameter to use by running the command:# esxcli storage core device list Read the data from the device:# esxcli storage core device smart get -d device Where device is a value found in step 1. The expected output is a list with all SCSI devices seen by the ESXi host. For example:t10.ATA_____WDC_WD2502ABYS2D18B7A0________________________WD2DWCAT1H751520 Note: External FC/iSCSI LUNs or virtual disks from a RAID controller might not report a S.M.A.R.T. status. This table breaks down some example output: Parameter Value Threshold Worst Health Status OK N/A N/A Media Wearout Indicator 0 0 0 Write Error Count…

We are happy to announce our participation in GitHub's Student Developer Program. This will give students free access to top-notch development tools from the biggest names in our industry. The beauty of the program is that it gives students a centralized place where they can access all of these great services, free of charge, so they get a hands-on, professional experience that allows them to learn by doing. For every student that signs up for the program, DigitalOcean will provide $100 in hosting credit. The pack itself also includes special student accounts for GitHub, Atom, NameCheap, Sendgrid, and other awesome companies looking to give back in some way. Here at DigitalOcean, our mission is to make developers' lives better and we believe strongly in creating a sense of community. As developers often get their start while in school, where cost can be a limitation, it's a privilege to have the opportunity to provide support for their education. You are entitled to participate in the program if you are 13+ and enrolled in a degree or diploma granting course of study. For more information about the pack, and how to apply, check the GitHub website: https://education.github.com/pack. Love, The DO Team P.S. If you've already applied a credit to your account, just open a support ticket with the promo code and we'll get you set up.

Just to let you know that WeLoveServers will be ending their 6GB Power VPS offer in just 4 days time, so now could be your last chance to order at this very low price. Power VPS 6GB 80 GB Disk Space Storage 10 TB Bandwidth 6GB Guaranteed RAM + 6GB vSwap 1 IPv4 Address SolusVM Access Full Root Access Choice of Linux OS's Self Managed Just $19 P/M or $189 Annually Pay annually get 2 months free! CLICK HERE TO ORDER

We wanted to let you know that today, a critical vulnerability in bash(Bourne-Again-SHell) was disclosed by Stephane Chazelas. This vulnerability is so critical that even if you have Two-Factor Authentication an attacker would be able to by-pass the two-factor verification and execute commands remotely on your server. We recommend you update now. Here's a few things to help you: To test if you are vulnerable you can use the following command: env t='() { :;}; echo You are vulnerable.' bash -c "true" If it prints "You are vulnerable" you need to upgrade as soon as possible. Patches for the major Linux distributions have been already released. If you are using a Ubuntu or Debian type the following commands to apply the security patch: apt-get update apt-get upgrade If you are using RedHat, CentOS or Fedora type the following commands to apply the security patch: yum clean all yum update bash If you want to know more about this vulnerability please read the following thread on the oss-sec mailing list: http://seclists.org/oss-sec/2014/q3/650

