How to install PHP 7 (stable) on VestaCP server running on CentOS 7 with some test results of how VestaCP + PHP 7 can perform together serving WordPress site. For your information, PHP 7 has just been released and many rumors say it can perform multiple times faster than previous stable PHP version and also as fast as HHVM. This is the most anticipated PHP version ever bringing many new features, enhancements, and improved performance.
Until the time I write this post, VestaCP is by default using PHP 5.4.x installed and running with web server (either Apache or Nginx). I’m not really sure why its developer still pack PHP 5.4 within VestaCP installation but as far as I know PHP 5.4 is the most popular stable version after 5.3 that many scripts, web apps and CMS are supported (can still run well with the PHP environment).
As per PHP 7, there are still not enough information of how many CMS / scripts except WordPressand OwnCloud those are already PHP 7 compatible. So if you are planning to build a WordPress site with VestaCP, you can try this tutorial and feel the awesomeness of PHP 7. But I must also remind you that since VestaCP doesn’t include PHP 7 by default yet, so I recommend you to not using VestaCP + PHP 7 on production websites unless you are a sysadmin Ninja. However, with default Vesta setup (Nginx as proxy + Apache + PHP), this method still can work properly so it is safe if you’ll just want to host personal blog or few blogs inside one server.
Step 1 – Install VestaCP on your vps, cloud or dedicated server. Despite this tutorial done on CentOS 7, but the steps are pretty much similar.
Step 2 – Once installed, still in Putty, you can do initial check of what PHP version is installed:
|
1
|
php -v |
it should look like this (PHP 5.4.45):

Step 3 – Now we need to install remi repo or at least make it updated. PHP 7 is considered new and is not available via Yum at base CentOS repo.
|
1
2
3
|
wget https://dl.fedoraproject.org/pub/epel/epel-release-latest-7.noarch.rpmwget http://rpms.remirepo.net/enterprise/remi-release-7.rpmrpm -Uvh remi-release-7.rpm epel-release-latest-7.noarch.rpm |
Here’s I show you in screenshot pics:

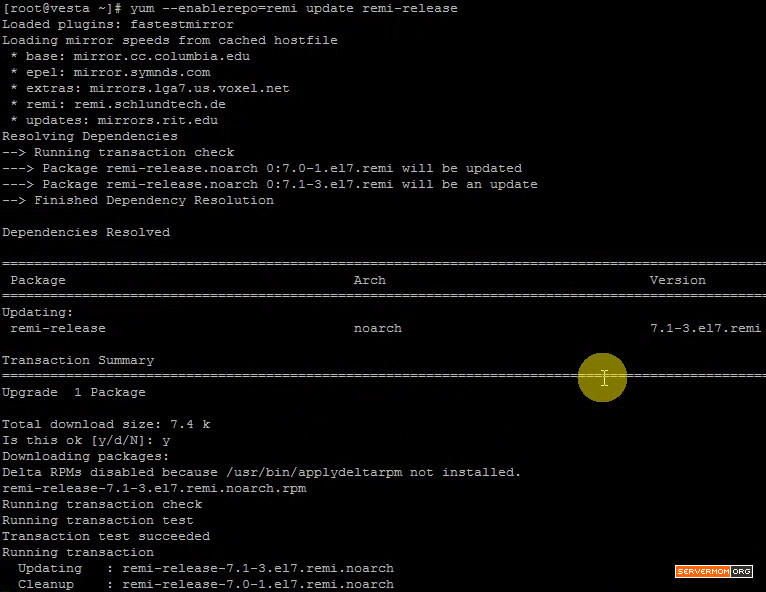
Step 4 – Now issue this command to update and enable it
|
1
|
yum --enablerepo=remi update remi-release |
Step 5 – Now delete current PHP installation but make sure you stopped Apache first:
|
1
2
|
service httpd stopyum -y remove php |
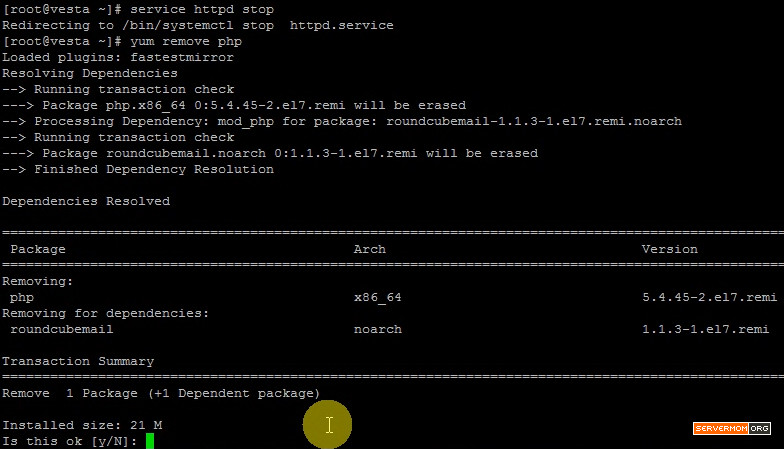
Simply answer Y when asked.
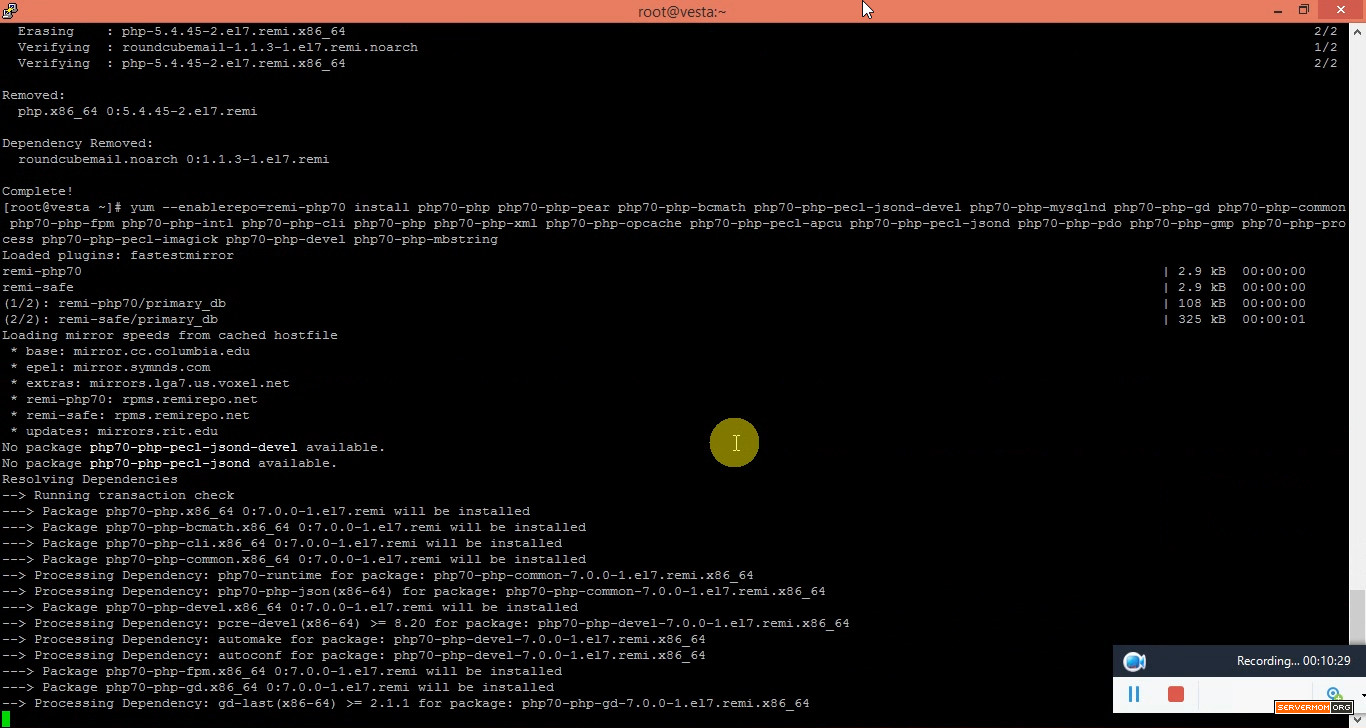
Step 6 – Finally, issue this command to install PHP 7.0 with all necessary modules:
|
1
|
yum --enablerepo=remi-php70 install php70-php php70-php-pear php70-php-bcmath php70-php-pecl-jsond-devel php70-php-mysqlnd php70-php-gd php70-php-common php70-php-fpm php70-php-intl php70-php-cli php70-php php70-php-xml php70-php-opcache php70-php-pecl-apcu php70-php-pecl-jsond php70-php-pdo php70-php-gmp php70-php-process php70-php-pecl-imagick php70-php-devel php70-php-mbstring |
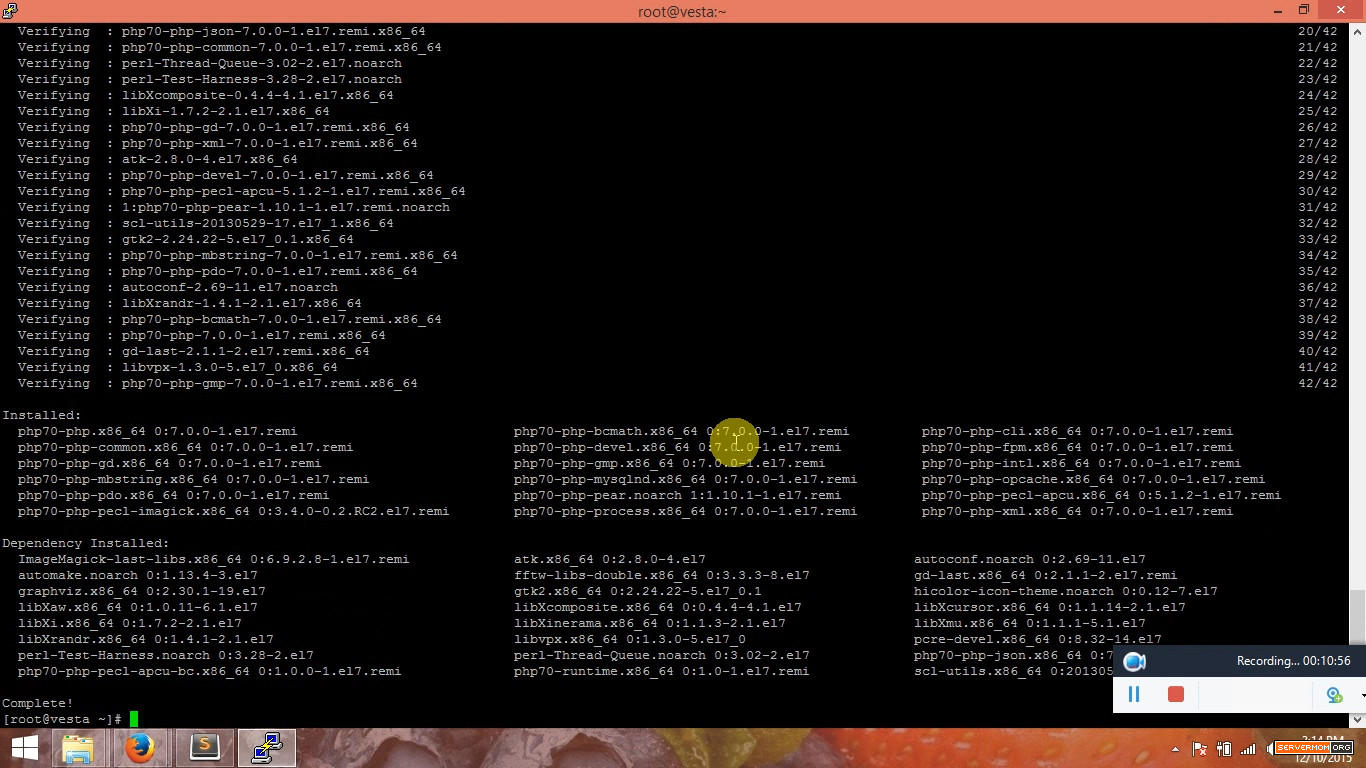
Wait till the process finished which in my case it took about a minute or two. When finished, your screen will look like this:
Step 7 – Next, at this point, you can simply stop the old PHP-fpm service and start the newly installed PHP70-fpm
|
1
2
|
service php-fpm stopservice php70-php-fpm start |
It’s simply like this pic:

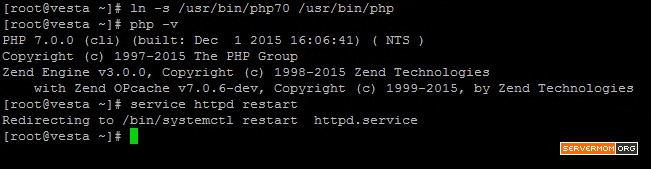
Step 8 – Finally you can delete the old php symblink and create a new one:
|
1
2
|
rm /usr/bin/phpln -s /usr/bin/php70 /usr/bin/php |

Also do not forget to restart Apache service / httpd:
|
1
|
service httpd restart |
Step 9 – Now you can check which version of PHP Vestacp is running:
|
1
|
php -v |
Done!
You can create simple phpinfo() page to see some detailed specs:
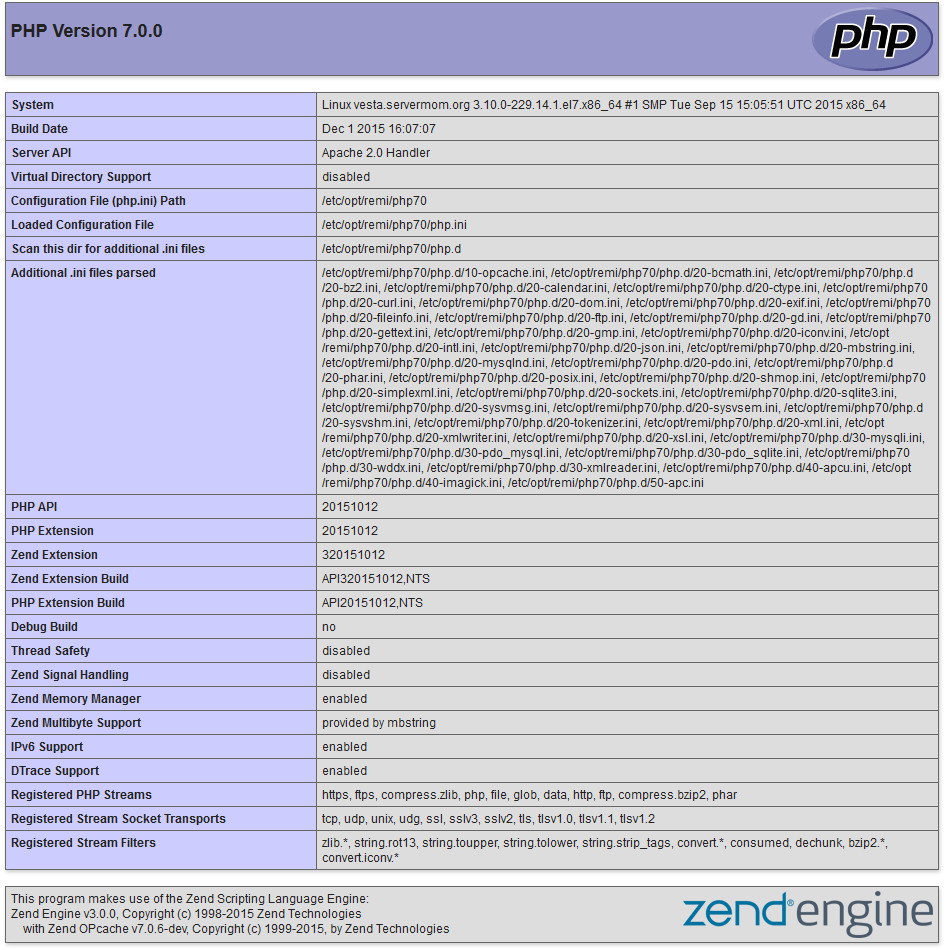
See? It is running PHP 7.0 now. How cool is that!
You can watch all steps above in my video to make sure you understand and be confident in following the steps.
What’s in the video:
- How to create CentOS 7 cloud server in Digital Ocean
- How to install Vestacp
- Some basic Vestacp configuration
- How to upgrade PHP to PHP 70 latest stable build.
- How to create database
- How to install WordPress
PHP 7.0 PERFORMANCE TEST
I installed Vestacp + PHP 7.0 in a sub directory, installed WordPress (v4.4) using Twenty Sixteen theme, and uploaded a full of dummy content on it (dummy content credits to WPTest.io). I used Digital Ocean droplet with 1GB of RAM + 1 processor core running CentOS 7.1 x64. The test done using free account of several server speed test services including Loader.io, Blitz.io and LoadImpact.com.
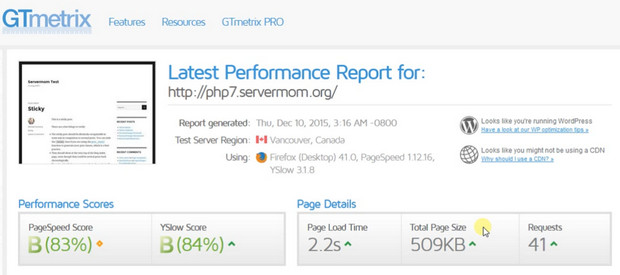
GTMETRIX PERFORMANCE TEST
PINGDOM SPEED TEST

LOADIMPACT.COM
Test #1: 25 unique users for 5 minutes duration:

Test #2: 50 unique users for 5 minutes duration:
Test #3: Test for50 unique users for 5 minutes duration of a blog’s page with many images:
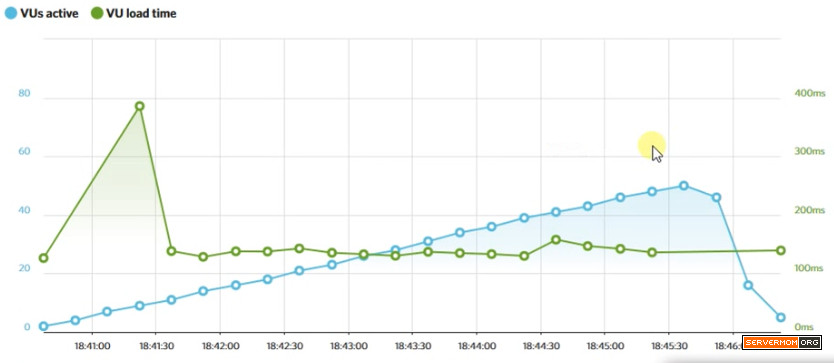
BLAZEMETER.COM
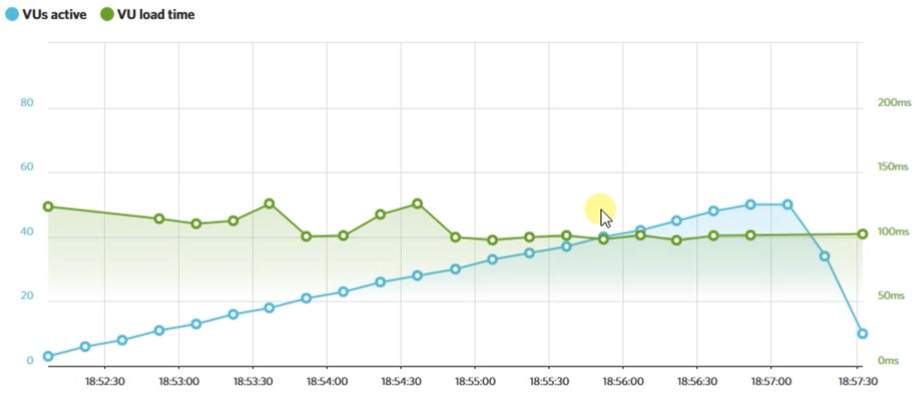
A 15-minute test with 20 UVs on homepage / index page

LOADER.IO
Test #1: Clients per second test model with 10 clients per second over 1 minute duration (or equal with 864,000 unique visitors per day)

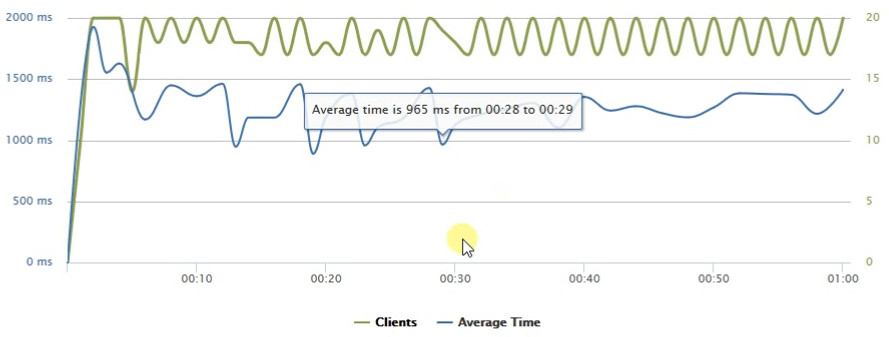
Result: The server can operate and serve request normally at that level of test while average response time is 1299 ms with 363 ms minimal and 2402 ms max.
Test #2: Clients per second test model with 25 clients per second over 1 minute duration (or equal with 2,160,000 unique visitors per day):

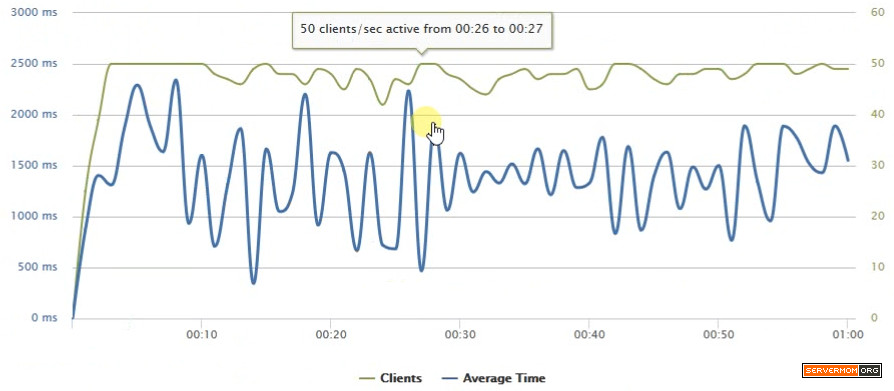
Result: The server still did not crash but it started delivering 500 error code (Internal Server Error). Average response time is 1407 ms with 11 ms min and 4565 max.

Comments